Projects, Projects, Projects!

Most of my projects are things that I have seen on the internet, on other people, or at stores. I draw from the things around me!
Showing posts with label skirt tutorial. Show all posts

Tuesday, January 29, 2013

Tutorial: Jersey Maxi Skirt

Maxi skirts are all over the place. Are they not? I love them for many reasons, but my favorite is that they are so comfortable and versatile! So, after finding some cheap jersey at JoAnn's I decided I was going to make one. This one has just the traditional waistband. I thought about going for the fold over, but decided I didn't want to sew that much for the night! This skirt is quick and easy.

Materials:
~ 1 yard of jersey
~ thread
~ measuring tape

The first thing I did was lay out the material. Because I wasn't sure how I wanted the flow of the skirt to go, I chopped it down the side so I had two different pieces. Did that makes sense?
 Next, I folded the material over and marked my waist measurement. For my waist measurement, I took the measurement, divided it in half, and then halved it again. Make sure to add a little room for seam allowance. I marked the measurement out and then cut from the mark down to the sides of the fabric. Like so:
 When you unfold the material you should have two pieces with identical sides. Next I pinned the sides and sewed the seams.

For the waistband, I measured my waist and measured the approximate height of the waistband I was going for. I wanted a waistband that was about 3 inches high. So, I cut out a piece that was my waist measurement long by 6 inches. I then sewed the two short end together to make a circle.

Once I had the circle I folded the waistband in half and pinned the edges under. 
 I then pinned the waistband to the skirt and sewed on. For attaching the waistband to the skirt, I recommend a zigzag stitch to allow for stretching when you slide the skirt over your bum/thighs.

The last thing I did was adjust the length of the skirt. Since it's jersey it's up to you on whether you want to hem it or not. I chose not to! And, because I keep forgetting to take a picture of the finished product on, I'm just going to post this as is!

Wednesday, November 28, 2012

Tutorial: Twist-and-Shout Skirt

A couple of weeks ago I saw on Pinterest this concept of a twisted panel. I wish I remember where I saw it so you could see! I liked the idea of the twist, but I didn't particularly like it as a panel. So, I thought it would make an adorable skirt! It's pretty easy even though it takes a bit more time than your average skirt. 

What you'll need for a 4T-ish sized skirt:
~ 1/4 yd of whatever fabric you'd like (I actually used fat quarters)
~ 1/4 yd of contrasting color
~ 1/2 yd for the skirt
~ elastic

First things first. 
For the skirt I cut a 22'' x 11" piece
For the twists I did 30 (of each color) pieces cut to 9" x 2"
For the skirt hem I cut a 22" x 4"
and
for the waistband I cut a 22" x 4" piece (this measurement will depend on how long you made the skirt piece!)

Here are my two contrasting pieces for the twists:

Match a colored and black piece together, right sides together, and sew down each long side. Make sure to leave the short ends open. Next I turn all 30 pair right side out, press them, and then trim the short edges.
After I've pressed the trimmed everything I sew the skirt piece together. Once that's sewn, I place the twists along the top about 2 inches down from the edge of the fabric. Once you've pinned all the twists in place sew them to the skirt piece.
After you've sewn all the twists to the top of the skirt piece, twist the bottom of the twists and pin under the neighboring twist. Does that make sense? If not, maybe the picture shows it better than I can explain.
Once all the twists are pinned sew them down.
Next comes the hem for the bottom of the skirt and the waistband. What you'll do is fold each piece in half and press. Then fold under the edges and press again. Pin the hem and waistband to the skirt making sure to encase the ends of the twists. Once everything is pinned, sew the hem and waistband on. For the waistband, make sure you leave a big enough opening to thread the elastic through.


When you're done, it should look something like this!
As for a final product photo, I don't have one! I made the elastic too small and can't get the skirt past A-girl's tush. Serves me right for guessing instead of measuring! I'll have to fix that though. Have fun and send me pictures!

sewmuchpotential (at) gmail (dot) com

Monday, November 19, 2012

Pattern: Pencil Skirt

One thing I like about making my own pencil skirt is that I can make it without darts, however long I want, and so that it will fit my body. I tend to have a harder time finding skirts, pants, shorts, etc. that will fit my hind end as well as my waist. I never could find exactly what I was looking for so I decided to make my own pattern. And it's super easy to do!
There are just a handful of measurements that I take which are easily done. Let's start with the front of the skirt.

**In the patterns below, I did not mark the seam allowance. I added that as I cut around the pattern pieces.**

The first measurement I take it the length of the skirt. I place one end of the measuring tape where I would like the waistband to be and go to my knee or just past. You'll need two of these: one for the front and one for the back.

The next few measurements focus on the waist/hip area and are all from side seam to side seam across the front. I measure at the natural waist, the hips, and then my thighs. Be mindful of the vertical distance between each measurement so you have a copy of your body's curves. With those three measurements, I divide them in HALF and mark them on a piece of paper (photo below). The next measurement I take is the width I want around my knees. I also divide this in half. I divide everything in half because I make my pattern so that the middle of the skirt will be the fold of the material and will make a more symmetrical pattern. In the picture below, the fold is on the left. You'll just cut 1 front piece when making the skirt.
 For the back pieces, I repeat the same process for the front. I measure from side seam to side seam across the back. For the back pieces I only measure at the waist, the biggest part of my bum, and the knee width. In the picture below, the left side of the pattern will be the seam in the middle of my back where the zipper will be placed. I add 1-2" to the middle seam (left side of pattern) to allow for the hemming of the slit and zipper. OR you can copy the outside curve from the front piece and extend the middle seam to the widest measurement. The first way is best with smaller tushes. You'll cut 2 back pieces.

 The last piece to the pattern is the waistband. This part is totally dependent on how tall you want the waistband. I make mine at about 2 inches tall and the length of my waist plus 4 inches. But, then I multiply the height of the waistband by 4. So, I'll have a strip that is 8" x my waist + 4". I multiply it by 4 because I fold the waistband in half and then fold in the edges to the middle. It strengthens the waistband and also eliminates the appearance of folded edges. A cleaner look.

For putting the whole skirt together, you'll find that in the tutorial for a True to Size Pencil Skirt.

For clarification or help shoot me an email: sewmuchpotential (at) gmail (dot) com.

Sunday, November 18, 2012

Tutorial: True to Size Pencil Skirt

I love me a pencil skirt. Let's just get that out there now. My only problem with a lot of them is that 1- they cost way more money than I want to spend and 2- I don't know if I don't know how to wear them or if I can never find one that fits me comfortably. Anyway.....I really do love them. They're classy, slimming, versatile, cheap ($3-7 on average), and easy to sew! Why not make your own? Here is how I pattern my own dart-less (because let's face it, I hate darts) pencil skirt, but in the meantime, here's a tutorial for how I put mine together!

Supplies:
~ 1 yd of fabric (you'll need more or less depending on what size you are. I'm somewhere between a 2 and 4.)
~ coordinating zipper
~button
~ interface

Once I've cut out all my pieces from my pattern, I've got this: one front piece, two back pieces, and the waistband (I forgot to take a picture of it before I fold and pressed everything - in case you were wondering what those lines were).
The first thing I work on is the waistband. I fold it in half and press, open it and then fold the edges in to the middle and press again. I then set aside the waistband until later.
With right sides together I match the back pieces to the front pieces of the skirt. I then sew down both seams.
From here, I put the skirt on, inside out, and pin the back. This part is a little tricky by yourself, but it is definitely doable. Especially with a full body mirror. This is the part where you can eliminate the darts in the back. I just pull the pieces together and pin down until I hit the point where I want to slit to start.
This picture is to demonstrate two things: taking the skirt off while it's pinned, and where you will press the fabric. While the skirt is still on, I carefully pin down the material on both sides and slip out. After I've taken it off, I take it to the ironing board and press the fabric - folded over twice so the material doesn't fray. This seam is where the zipper will go in and makes the back slit.
Once the material is pressed, I like to line the edges of the back pieces together then line the zipper up and put a pin where it ends.
With the back edges still lined up, I sew from the bottom of the zipper pin and down the first fold line until I hit the point of the slit
When I'm done, the top should look like this: 
Next, I pin the zipper in and sew it to the skirt.
So far you should have a pretty little skirt starting to take shape! Next is the waistband. I fold right sides together, pin, and sew JUST one of the short ends. That's it. Oh, and snip the corners so I'll have a sharper corner. Hopefully, the picture demonstrates what I mean by folding the waistband.

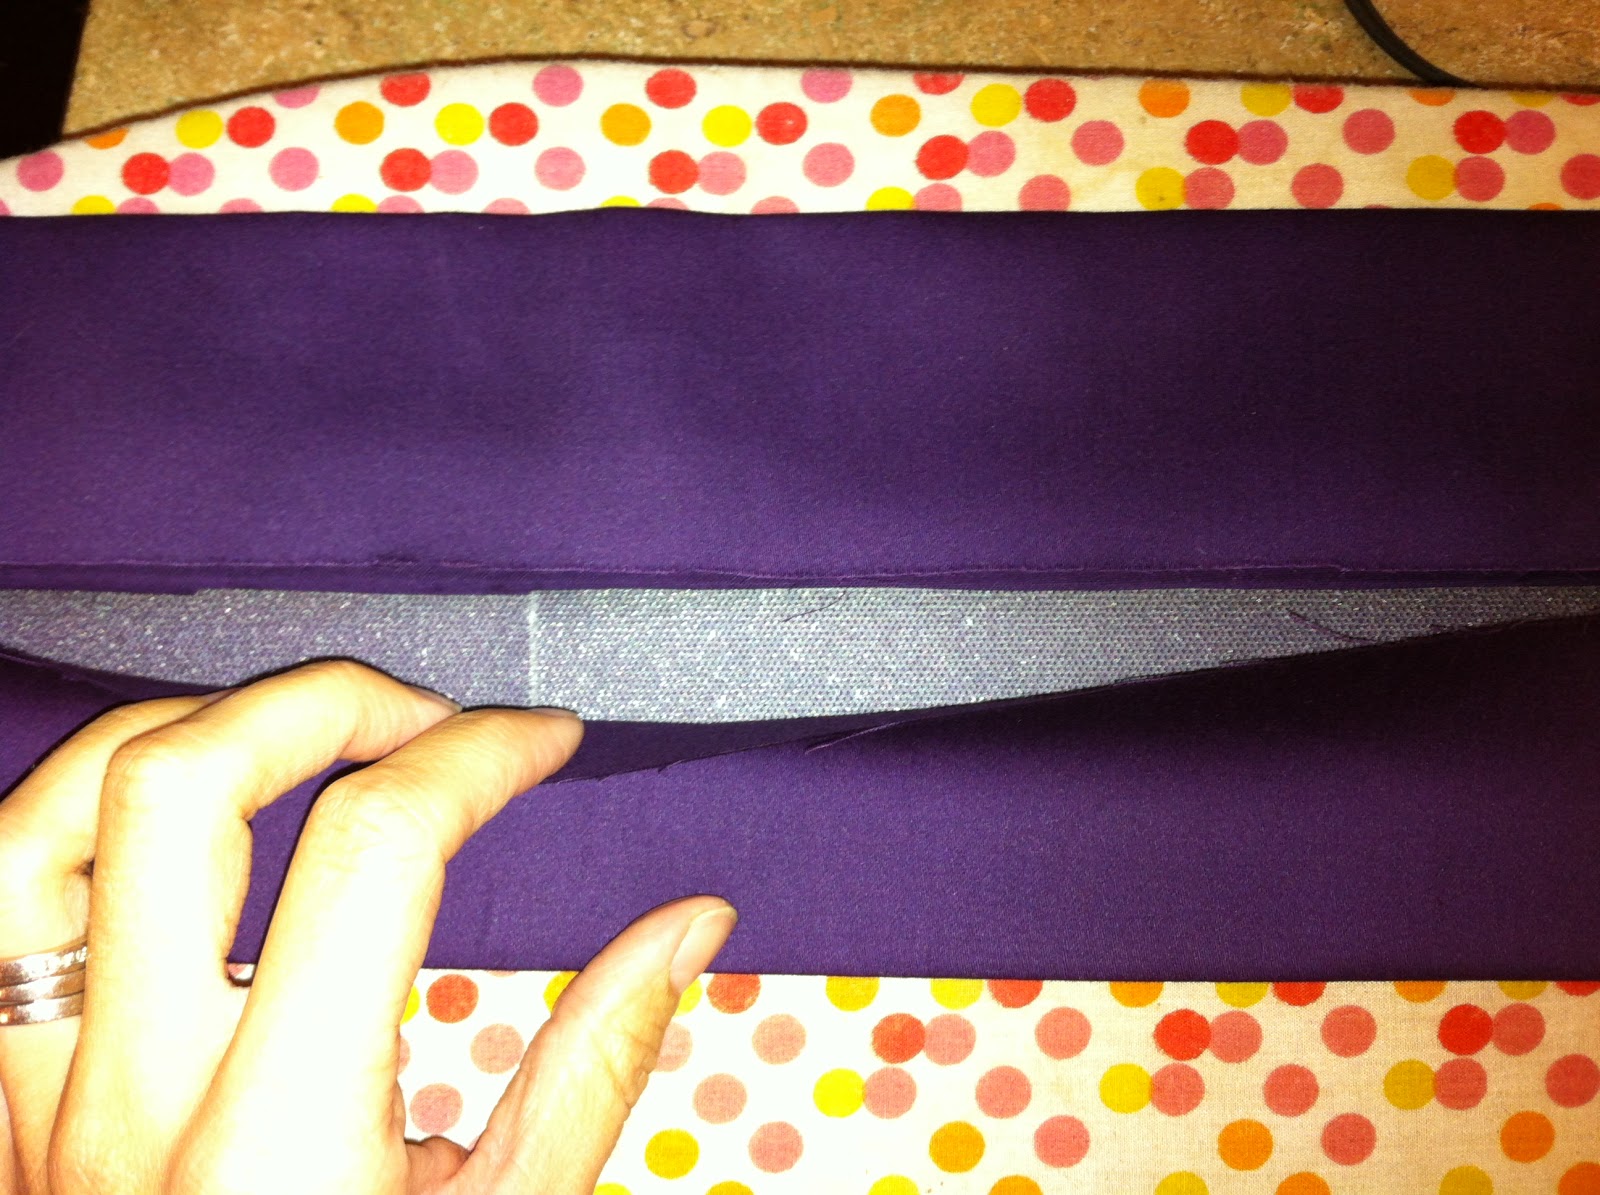
For the waistband I like to fortify it with some flexible interfacing. The stuff I like to use is iron on, but it's sticky before you iron so it will stay in place! Cool, huh? And technically, I think it's fusible web, not interfacing. Is there a difference? Now you know how little I know about sewing! Anyway.....I cut out strips to line the waistband. For my waistband, it's about 2" wide strips by however long the piece of web is. 

I take the interface pieces and line them up in the waistband, sticky-side down.
Next, I fold the waistband shut again and press it.
The waistband is now prepped and ready to be attached to the skirt! Wahoo! Almost done! K, with the short edge of the waistband that has already been sewn together, you'll line that end up to the edge of the skirt just above the zipper. Pin the waistband and skirt together
When you make it all the way around the skirt you'll be left with the raw edges of the waistband. At this point, I fold the end right-sides together and sew the short end. Snip the corners and flip is back out.
Here it is with the corners flipped back out. Sew the waistband to the skirt.
Last few steps! Mark your button holes on the extra length of the waistband and sew. Attach the buttons. Hem the skirt to your desired length.
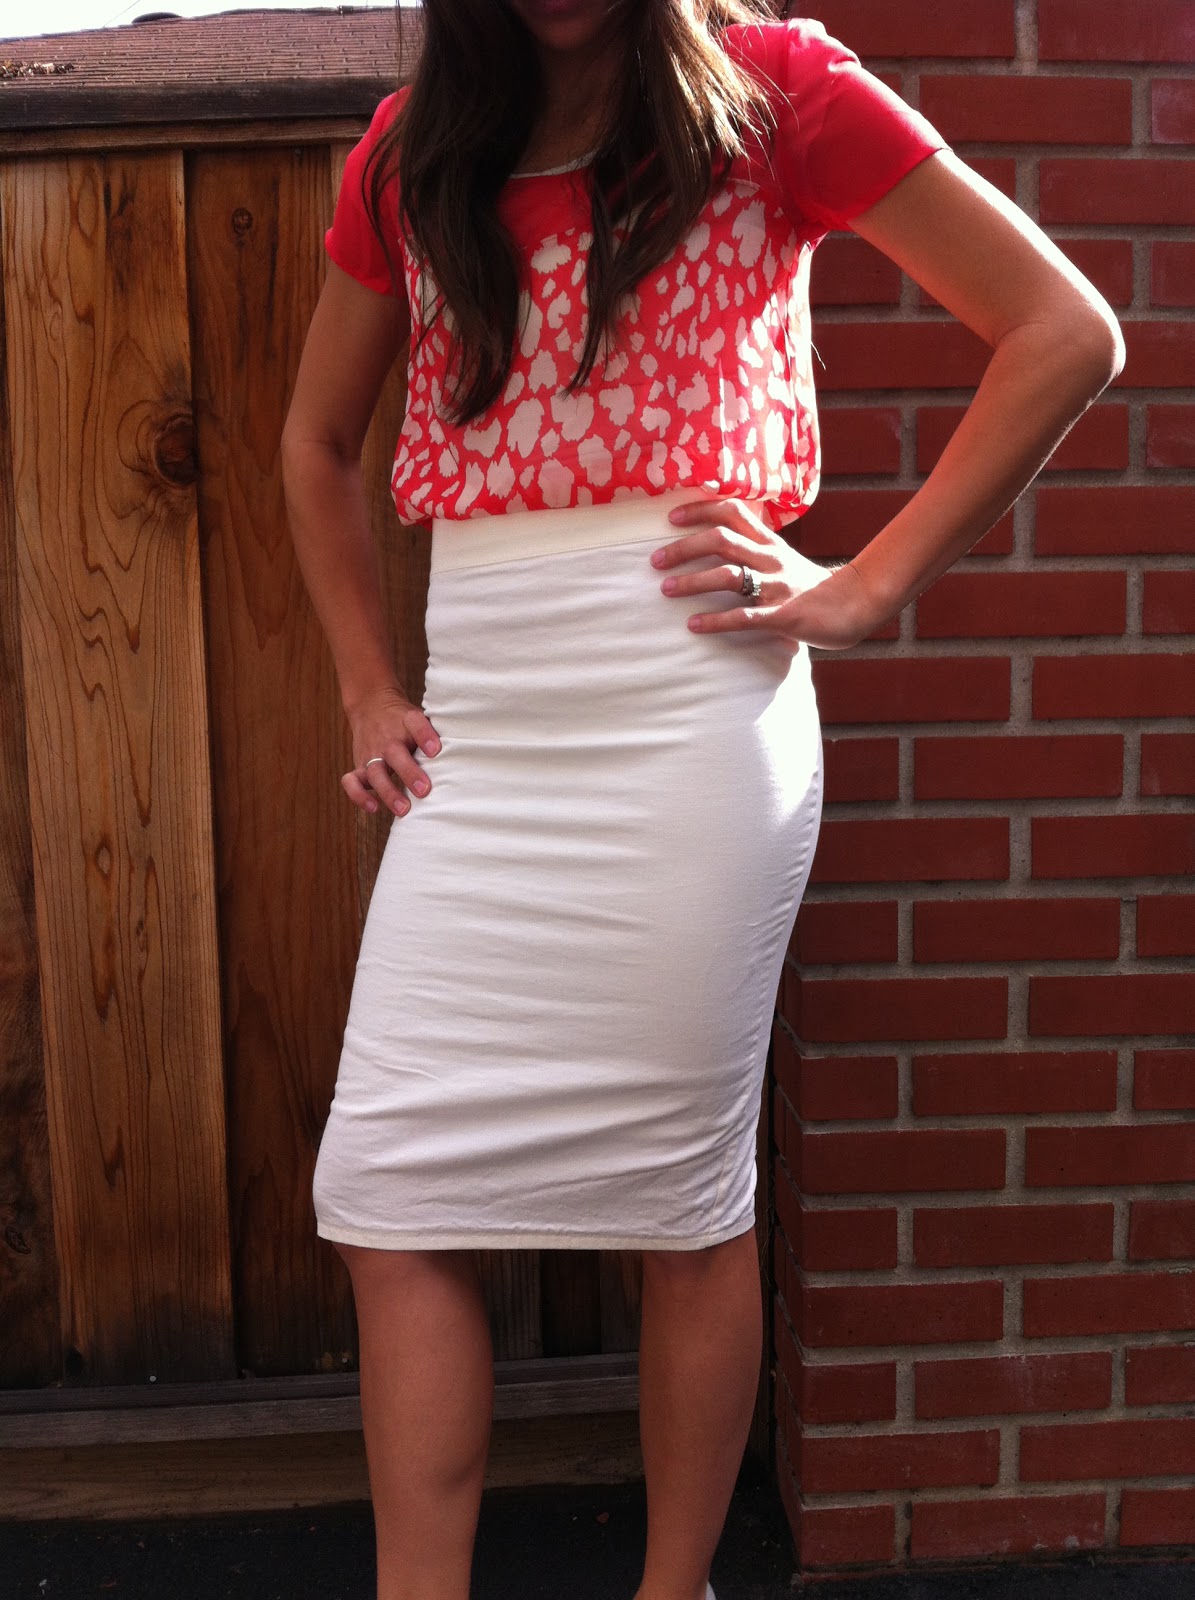
And ta-da! You've got yourself your own pencil skirt that no one will ever know was handmade. Trust me, everyone at Church is surprised to find out I made my skirt!

 My favorite part is digging through my button collection!
If you have any questions on how I did something or want to share what you've done, then send your thoughts/pictures my way: sewmuchpotential (at) gmail (dot) com.